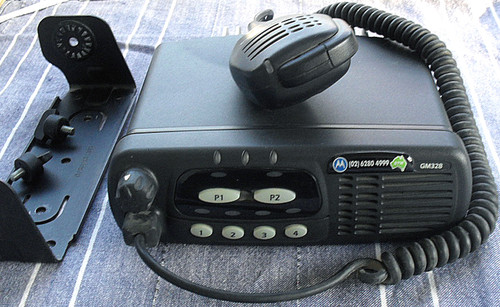
This equipment is offered more for the experimenter who may wish to use it within its design specifications OR hack/modify it for use "out of band" perhaps go lower into the Amateur 70cm band or up into the CB UHF frequencies.
UHF Transceiver - Mobile/Desktop
Manufacturer: BFDX
Model: BF980 UHF
Chinese, looks similar to a Motorola with many cosmetic similarities - this is your budget UHF transceiver, selling in USA for US$193 RRP
Brand new - in the box/original packaging
Includes vehicle power cable
Microphone
Transceiver
You also get the magnetic antenna base
Whip antenna to suit the frequency and base used
User instruction booklet - extremely poor English but if you use commonsense then you can figure out most functions such as scanning etc
This is not a bad little unit - not built to the same standards as a Motorola - the front panel buttons in particular "feel" a bit on the light side.
So all you need to do is program the beastie!
FIRST UP - you CANNOT listen to VKG (Police) or the GRN network - the former uses APCO25 with encryption and GRN is a trunked system
This radio is stock standard analog TX/RX but with QT (if desired) and you can also fit an optional module for voice encryption.
So, conventional analog ONLY - absolutely useless for a trunked system
By the way, if you are interested in the world of GRN in particular - you can listen live online via this site http://www.broadcastify.com/listen/ctid/4350 HOWEVER you cannot determine which channel you are hearing but it can be useful when bushfire communications are of interest.
Now this equipment may well be "hackable" as this series is designed for 400Mhz to 470Mhz but this particular unit only can be programmed in the range 450 - 470Mhz as supplied.
So, how do you program it?
Two methods:
Via cable (you can get these online - I have the software but it is ALL in chinese!)
Via the front panel - yippee! I had a play around with the unit and here is the programming procedure
Radio Off
Hold down the 1 button while pressing the ON button
Backlight comes on
Using the channel up down buttons you can now choose which channel you wish to program – a maximum of 64
Push 1 button – you will now see the most significant 3 digits of the frequency set already OR you will see 3 dashes (no frequency set)
Using the channel button you can increment or decrease the frequency in 1Mhz steps over the design range of 450 – 470Mhz
Push 1 button and you will see the least significant 3 digits of the frequency set already OR you will see 3 dashes
Push A – this sets the stepping of the least significant part of your frequency – 5Khz 6Khz or 100Khz
When you have your desired step showing (it flashes) then use the channel up down buttons to move to the desired frequency – the least significant digits
This is your Frequency set up one side ( RX)
Push the 1 button
You will probably get "non" showing – below this is two little indicators – QT and DQT
I think this is a fair bet to be the CTCSS control area – non probably indicating OFF
Pushing A at this point steps through non – d9E – d9 (Its not actually an E but looks like an E with the top chopped off)
If you choose d9 or d9E you can then use the channel button to step through all the 39 frequency choices for QT
Push 1 again – now it shows 01 and this can be stepped up and down using the channel up down buttons – I am not sure what this is – possibly a priority setting of the channel.
NOW YOU CAN SET UP THE TX SIDE OF THINGS
Another push of the 1 button and the red light comes on in addition to the yellow light – to me this means that TX is being setup
Use the same procedure as steps 1 & 2 for RX frequency setup
Next you get asked about the QT code, same format as for the RX setup above
Next push of the 1 button you get an L – the channel up down buttons toggle off this very small word in the bottom right of the screen LOW – I am assuming this is power output control, low or high (full power)
Next push of the 1 button you get an H – the channel up down buttons toggle off a very small “available – not available” type indicator to the left of the H letter – no clue what this is doing quite frankly
Next push of 1 you get a P – I cannot seem to change this and do not know its function
Next push of the 1 and you get the E character showing (but with the top of the E chopped off)
Like the P step above, when I push any button that seems to be used for programming, (Channel up down, A) then there is no response on screen
Pushing the 1 button again, the unit steps to the next channel setup – by default it increments the channel by one but you can change the next channel setup using the channel up down buttons
If at any time you wish to clear all settings in a particular channel, you push the Volume down button – it looks to clear all settings for the channel currently being programmed


